Multiple persistent stores in Core Data
Core data is brilliant. If your app handles data that can be represented by a graph of linked objects, and you’re not using it, you’re probably doing it wrong.
Unfortunately, most core data apps are built by ticking the “Use Core Data” option when creating a new project, and there are numerous problems with this template code. One overlooked problem is that it does a lot of the setup for you, and therefore a lot of developers don’t actually read or understand what setting up a core data stack involves or what the possibilities are. For example, it is possible to split up the storage for your model into multiple persistent stores. The template sets you up with a single persistent store, with all objects assigned to it, and most of the time this doesn’t change. However, it’s called a persistent store coordinator. You’d expect it to be able to do some coordinating. As the documentation states:
The coordinator is designed to present a facade to the managed object contexts such that a group of persistent stores appears as an aggregate store.
This article will discuss why you’d want to do that, and how to go about it.
Why would you want multiple persistent stores?
Have you ever encountered the following situation? You want to have a managed object model, with relationships between objects, but:
- Your app has a fixed data set that is included as part of the bundle
- Some of the data your app handles is sensitive information that you don’t wish to be persisted on disk
- You have different storage requirements for different entities
You may have dealt with the first requirement by copying a file from your bundle into a writable location and using it as the base of your entire data store. You may have dealt with the second by manually deleting objects. A separate persistent store is a much better solution in both cases. Each persistent store has its own characteristics - it can be read-only, stored as binary or SQLite or in-memory (on OS X, an XML backing store is also available), or your own implementation of an NSIncrementalStore. It is possible to store different parts of your model in different persistent stores to take advantage of this flexibility.
#Setting up multiple persistent stores
Configurations
Looking at the core data model editor, we have Entities, Fetch Requests and Configurations in the list on the side:
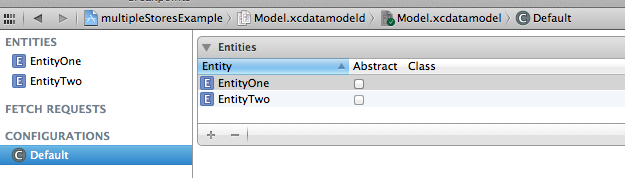
We are interested in “Configurations”. When you add an entity to your model, a configuration called Default is created and the new entity, and all subsequent ones, are added to it. Selecting this configuration shows a list of all of the entities in your model, with add and subtract buttons at the bottom of the list, which are disabled. Double-clicking the configuration doesn’t do anything. There’s no obvious way to do anything with the contents of the configurations list.
Adding configurations to the data model
You can add a new configuration using Editor –> Add Configuration. Now things start to get interesting. Selecting this configuration gives us an empty list of entities. The plus button on the list is still disabled. I’ve never actually seen it enabled. You can instead add entities to the configuration by dragging them from the Entities list.
We want one configuration per store, and each entity should be added to one configuration only (in addition to the default configuration). It is possible to have entities in multiple configurations, but in that case you have to manually assign each object to a store, so we’re not going to cover that here.
By creating one configuration per store and assigning each entity to a single configuration, we’ve enabled the core data frameworks to direct entities to different stores without needing any further interaction.
Creating persistent stores
The core data template creates a persistent store like so:
[_persistentStoreCoordinator addPersistentStoreWithType:NSSQLiteStoreType
 configuration:nil
 URL:storeURL
 options:nil
 error:&error];
Knowing what we do now, we can look at the configuration: argument. The documentation states:
The name of a configuration in the receiver’s managed object model that will be used by the new store. The configuration can be
nil, in which case no other configurations are allowed.
So all we need to do is add as many persistent stores as we have configurations, passing in the appropriate configuration name for each one. You’d also specify different store types and URLs as appropriate:
[_persistentStoreCoordinator addPersistentStoreWithType:NSSQLiteStoreType
    configuration:@"StoreOne"
    URL:storeURL
    options:nil
    error:&error];
// Check errors and respond as appropriate
[_persistentStoreCoordinator addPersistentStoreWithType:NSInMemoryStoreType
    configuration:@"StoreTwo"
    URL:storeURL
    options:nil
    error:&error];
Relationships between entities in different persistent stores
You can’t make relationships between entities in different stores. According to the documentation:
You must be careful not to create relationships from instances in one persistent store to instances in another persistent store, as this is not supported by Core Data. If you need to create a relationship between entities in different stores, you typically use fetched properties.
This seems like a bit of a downer, and results in Cocoa error 134020 if you try to save the context.
However, if your relationships are not permanent (for example, between a SQLite store and an in-memory store, which by definition can’t be persisted), then you can mark the relationship as transient and you don’t have to deal with fetched properties. The next time you load the database, any relationships will be nil.